
Creating animated code snippets with Tempest Highlight & PHP-GLFW
This is a fun one (for me, at least). Ever since I saw @brendt's syntax highlighter, I've wanted to build something with it, especially as my frustration with JS-based highlighters began to grow.
So this one, renders entirely on the backend. (No HTML/CSS/JS)
 mario-deluna
I like tools like https://carbon.now.sh, but then I realized I get inconsistent results depending on which browser I use. The more I started to Photoshop the images it generated, the more I wanted to implement something similar for myself.
It's a classic case of a lot of my time to solve a very minor issue.
Anyway, I also wanted to have animations without ending up screen recording them.
So, let's build a "Code Snippet Animated GIF Generator".
Scaffolding
The goal of this project is to have a PHP script that I can run, which will result in a video and/or GIF of a given piece of code.
First I begin by creating a new VISU project, the reason here is simple.
- I don't want to deal with all the boilerplate required to get rendering going.
- The quickstart by default already renders into an Off-Screen buffer allowing us to easly dump frame by frame to FFMPG or something.
composer create-project phpgl/visu-quickstart -s dev --prefer-dist code-gifs
Let's enter the project and add the most important dependency, the Tempest syntax highlighter.
cd code-gifs
composer require tempest/highlight
Now, open up the src/Application.php file, in which we are going to implement most of the logic (this is not a tutorial on clean code).
You can run the application using:
php bin/start.php
Tokenizing
The first thing we want to tackle is tokenization. Because we aim to build our own rendering mechanism, we need a clean, organized list of tokens that we can render individually.
In a typical scenario, the Tempest highlighter returns a markup version of a given piece of code. This means it properly encloses variables, keywords, and so on, in, for example, HTML tags.
However, this isn't what we need. We want a data structure that we can use for ad-hoc rendering.
Something like:
[
  ['type' => 'variable', 'value' => '$answerToEverything'],
  ['type' => 'operator', 'value' => '='],
  ['type' => 'number', 'value' => '42'],
]
So, instead of using the Tempest highlighter directly, we'll just use its internals:
use Tempest\Highlight\Languages\Php\PhpLanguage;
use Tempest\Highlight\Tokens\GroupTokens;
use Tempest\Highlight\Tokens\ParseTokens;

$code = <<<'php'
// really important!
$answerToEverything = 42;
php;

$parsedTokens = (new ParseTokens())($code, new PhpLanguage);
$groupedTokens = (new GroupTokens())($parsedTokens);
This will give us an array of Tempest\Highlight\Tokens\Token objects with nice and proper offsets and the type definition of the token.
echo $groupedTokens[0]->type; // enum(TokenTypeEnum::VARIABLE)
echo $groupedTokens[0]->value; // $answerToEverything
Bridging the Gap
One thing that surprised me, but makes sense in the context of a syntax highlighter, is that not everything is actually tokenized.
Unlike the lexer for a programming language, a syntax highlighter does not necessarily need to index tokens that will not be handled specially.
For my use case here, I need a token for everything, even formatting. This will make the rendering process far easier.
use Tempest\Highlight\Tokens\TokenType;

enum FormattingTokenType: string implements TokenType
{
  case NEWLINE = 'newline';
  case OTHER = 'other';
  case SPACE = 'space';

  public function getValue(): string {
    return $this->value;
  }

  public function canContain(TokenType $other): bool {
    return false;
  }
}
Where:
- NEWLINE obviously refers to line breaks
\n. - OTHER refers to all other content not covered by the normal tokenization.
- SPACE ...
Now the simplest way for me add these was to simply look for gaps between the token offsets and fill them with my own tokens.
use Tempest\Highlight\Tokens\Token;

$lastOffset = 0;
foreach ($groupedTokens as $group) {
  $offset = $group->start;
  $length = $offset - $lastOffset;
  if ($length > 0) {
    $content = substr($code, $lastOffset, $length);

    // ensure linebreaks to be split seperately
    $content = str_replace("\r\n", "\n", $content);
    $parts = explode("\n", $content);

    foreach ($parts as $i => $part) {
      if ($i > 0) $tokens[] = new Token($offset, "\n", FormattingTokenType::NEWLINE);

      // if the trimmed part is empty, it was one or more spaces
      if (strlen($part) === 0) {
      } elseif (trim($part) === '') {
        $tokens[] = new Token($offset, $part, FormattingTokenType::SPACE);
      } else {
        $tokens[] = new Token($offset, $part, FormattingTokenType::OTHER);
      }
    }
  }
  $tokens[] = $group;
  $lastOffset = $group->end;
}


// add the remaining part of the code
$content = substr($code, $lastOffset);
$tokens[] = new Token($lastOffset, $content, FormattingTokenType::OTHER);
I'm sure there are better ways to do this, but that's what I did 🤷
So now that every part of the code is represented as a token, let's quickly print how our tokenized structure looks like:
foreach($tokens as $token) {
  echo $token->type->getValue() . ': ' . trim($token->value) . PHP_EOL;
}
Which results in:
comment: // really important!
newline:
variable: $answerToEverything
other: = 42;
Place the above code in the ready function and ensure the $tokens are available in the Application class.
Rendering
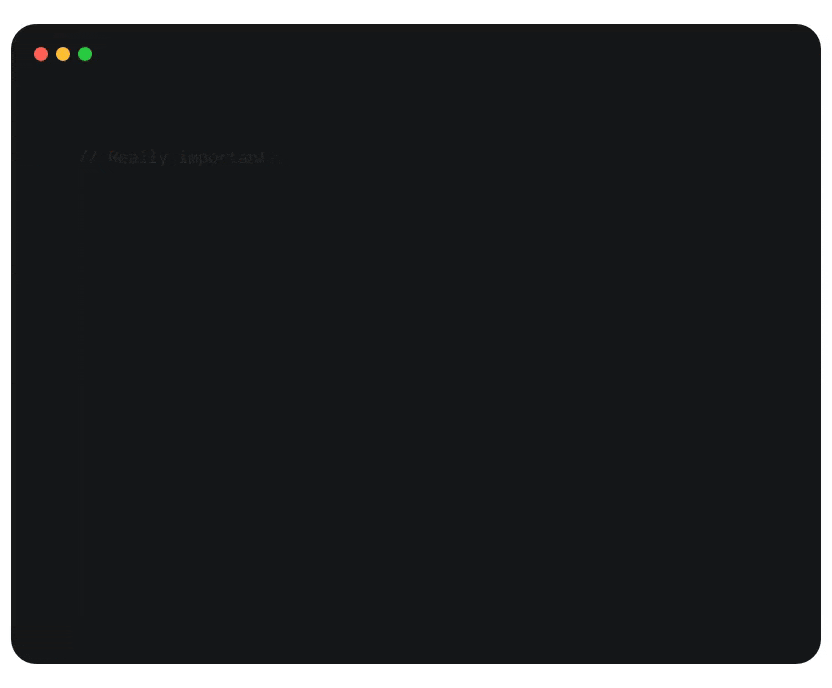
It's time to get visual. First off, let's not think about animations; let's first just try to get the code on the screen.
The text function of the VectorGraphics API usefully always returns the new x-coordinate after text has been rendered:

This makes rendering our tokens fairly simple.
In our draw function, we can do the following:
- Iterate over each token.
- Update x coordinate based on the return value of the
textfunction. - Update y coordinate for new lines.
$baseX = 150;
$baseY = 150;
$fontSize = 20;
$lineHeight = 1.5;

$x = $baseX;
$y = $baseY;

$this->vg->fillColor(VGColor::white());
$this->vg->fontSize($fontSize);

foreach ($this->tokens as $token) {
  if ($token->type === FormattingTokenType::NEWLINE) {
    $y += $fontSize * $lineHeight;
    $x = $baseX;
    continue;
  } elseif ($token->type === FormattingTokenType::SPACE) {
    $x += strlen($token->value) * 10;
    continue;
  }

  $x = $this->vg->text($x, $y, $token->value ?? '');
}
Looks pretty boring, but we've got the text properly aligned and positioned.
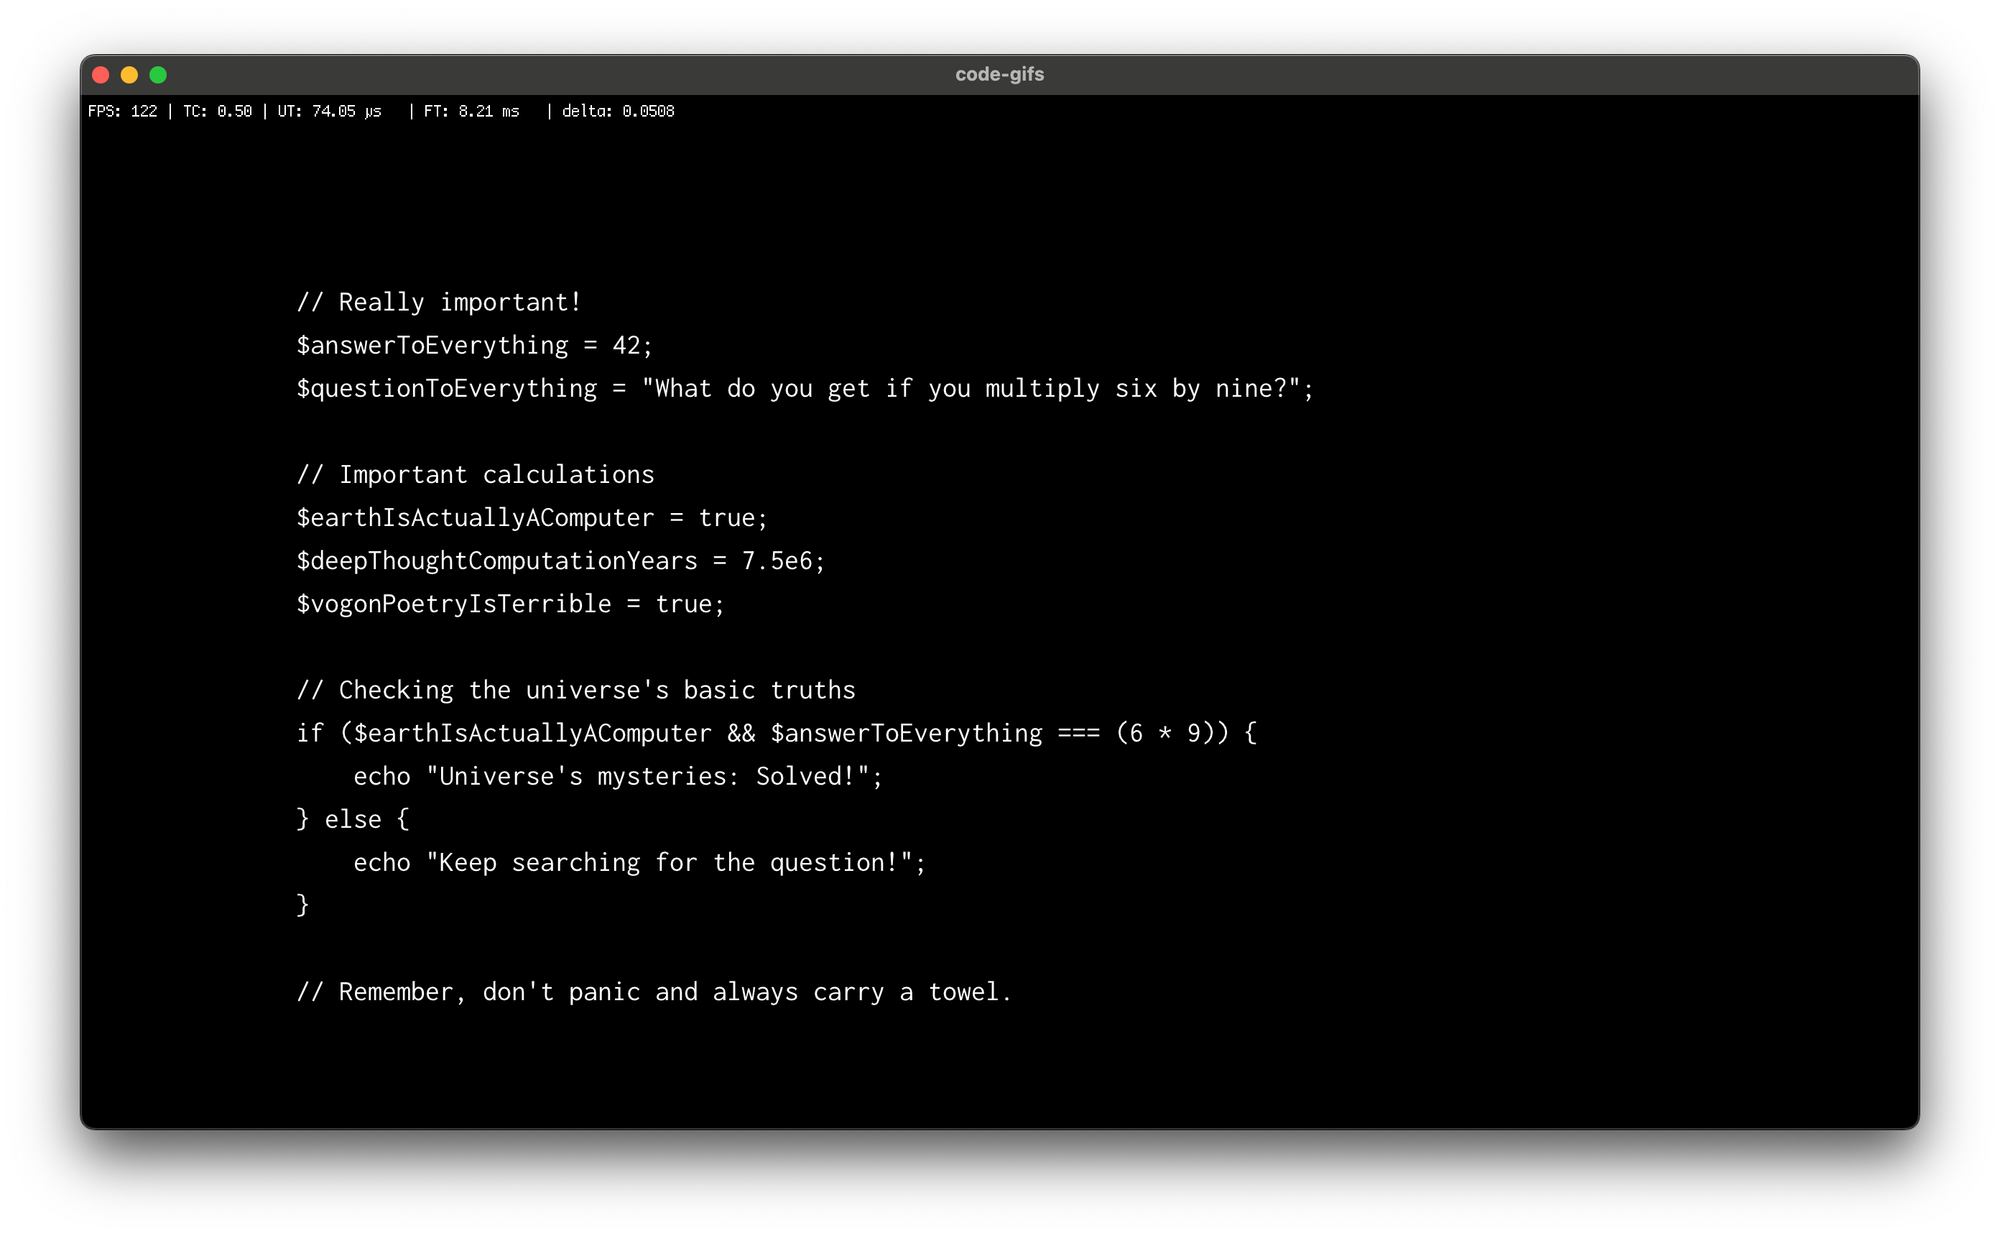
Colors
Let's bring some colors into this.
Without parsing the CSS of the existing themes, we unfortunately cannot directly utilize them, but fortunately, creating or adapting a theme for our purpose is incredibly easy.
All we need to do is map all token types to colors:
I'm just going to build a simple map like this:
$colorTokenMap = [
  FormattingTokenType::OTHER->value => VGColor::white(),
  TokenTypeEnum::COMMENT->value => VGColor::hex('#8b949e'),
  TokenTypeEnum::KEYWORD->value => VGColor::hex('#ff7b72'),
  TokenTypeEnum::PROPERTY->value => VGColor::hex('#d2a8ff'),
  TokenTypeEnum::ATTRIBUTE->value => VGColor::hex('#d2a8ff'),
  TokenTypeEnum::TYPE->value => VGColor::hex('#EA4334'),
  TokenTypeEnum::GENERIC->value => VGColor::hex('#9d3af6'),
  TokenTypeEnum::VALUE->value => VGColor::hex('#a5d6ff'),
  TokenTypeEnum::VARIABLE->value => VGColor::hex('#ffa657'),
  TokenTypeEnum::OPERATOR->value => VGColor::gray(),
];
This map is basically a direct copy from the github-dark-default theme of the Tempest highlighter.
Now, all that's left is to apply the colors to the text:
$this->vg->fillColor($this->colorTokenMap[$token->type->getValue()]); // <- this line
$x = $this->vg->text($x, $y, $token->value ?? '');
Et voilà:
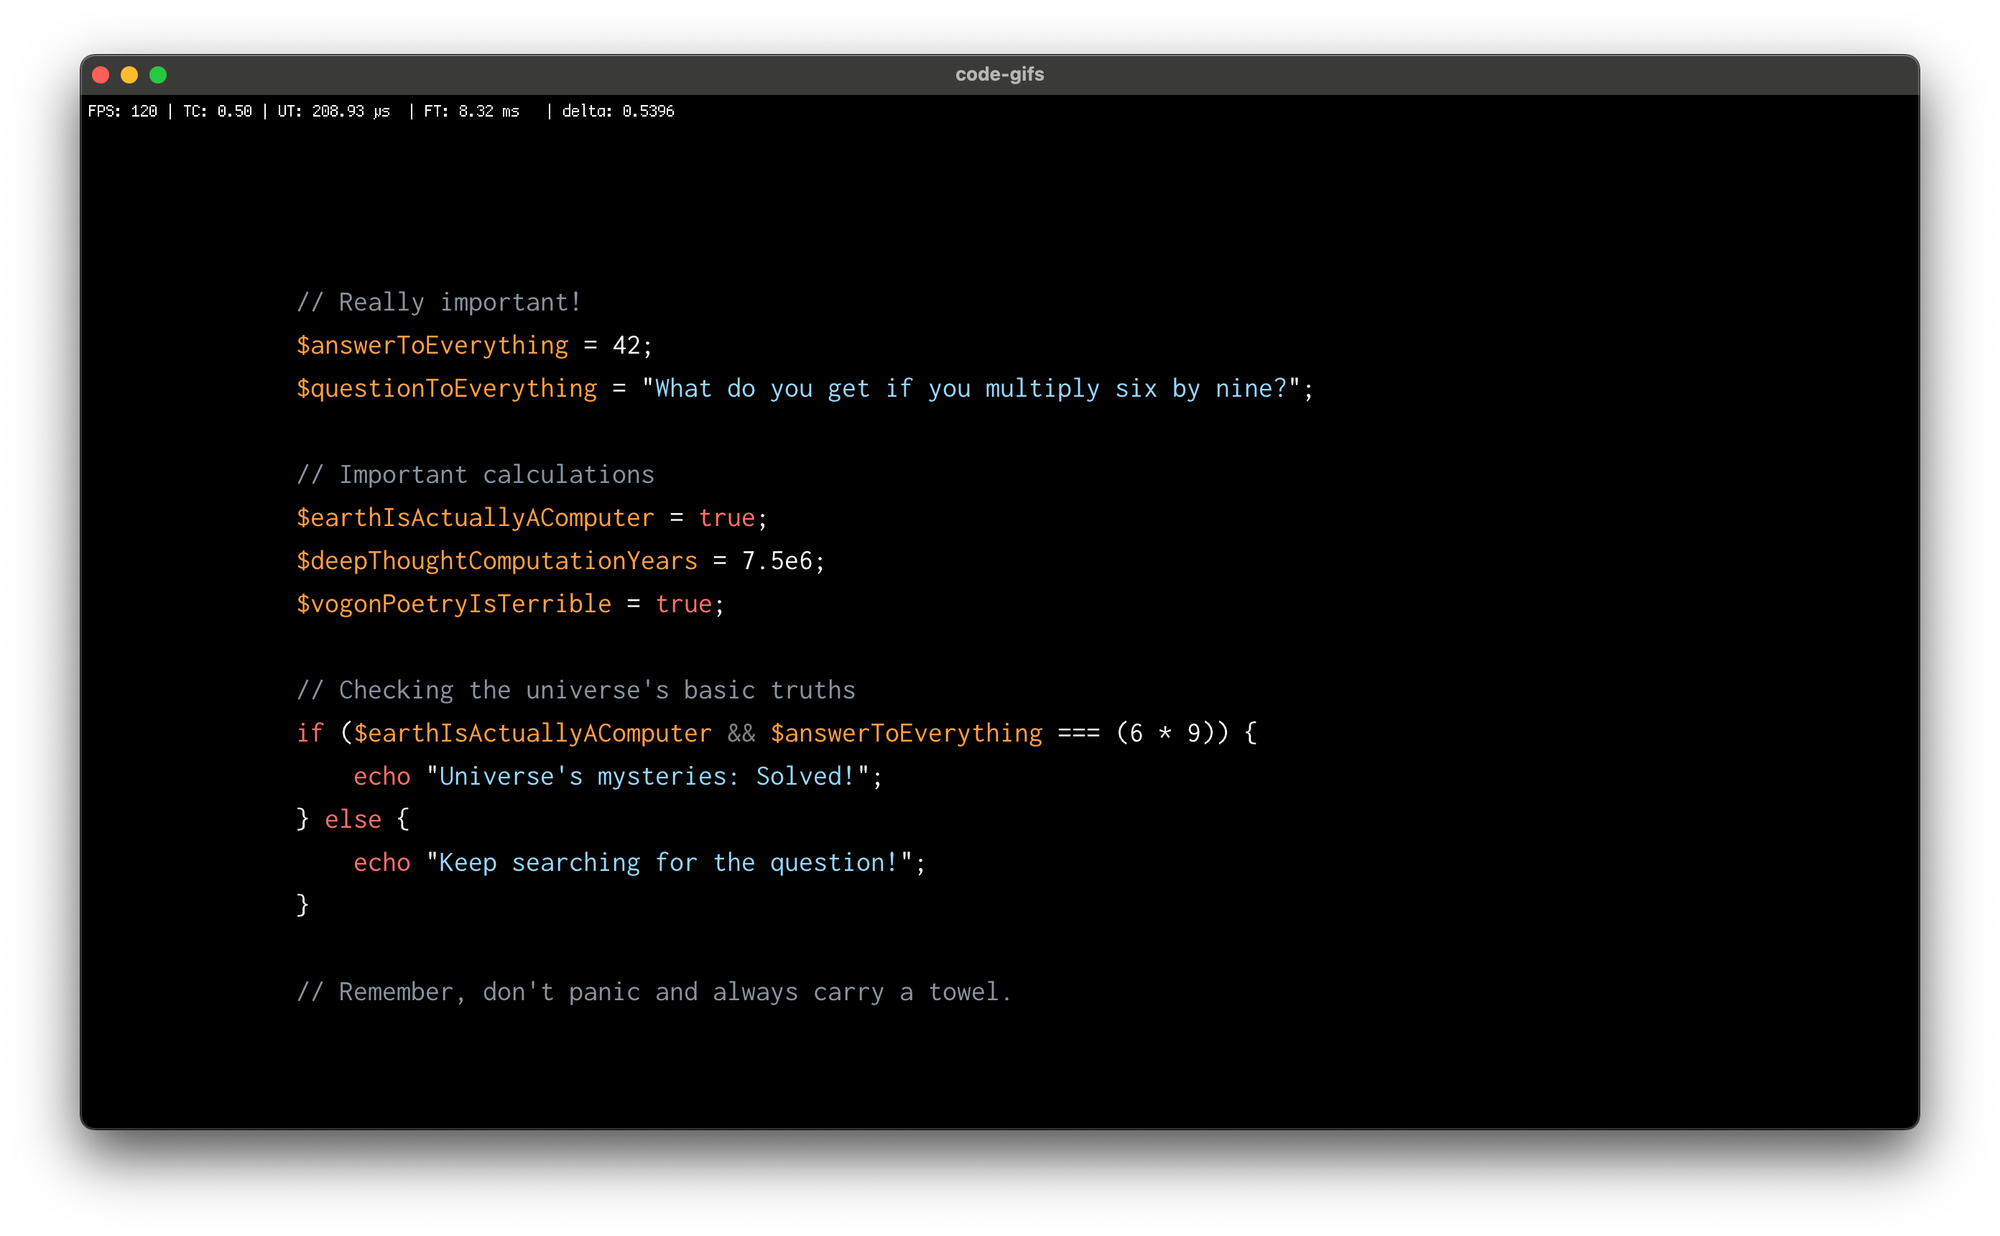
Animation
Now that we have the basic rendering down, let's get to the fun part: animating the code.
We want to be able to:
- Render the animation in some sort of preview mode in real time.
- Render the animation frame by frame to create a perfectly paced video file.
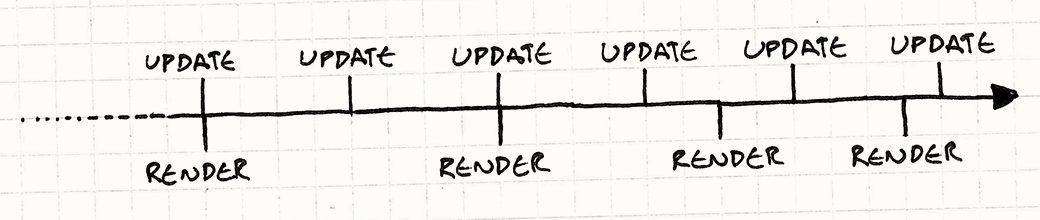
To support both cases, we have to be able to precisely control time and base the animation on said time.
The simplest way to do this is to just count ticks, assuming they happen at a fixed time interval.
$tick = (int) (glfwGetTime() * 60);
This will do the trick for now because we mostly care about offline rendering to a video.
This can and will cause slight stuttering in the preview because our frame rate is not coupled to our update tick:
In abstract, what we have to do:
- Figure out which token needs to be animated at the current tick.
- Determine the progress of the animation at the current tick.
- Apply changes to the position and/or color of the token based on the animation progress.
// how many ticks does it take to animate a single token in?
$ticksPerToken = 15; // 0.25s

// which token is currently beeing animated
$tokenAnimationIndex = (int) ($tick / $ticksPerToken);
Figuring out the progress can then be easily done by:
$tokenProgress = ($tick % $ticksPerToken) / $ticksPerToken;
Now we can update the rendering loop:
$currentTokenIndex = 0;
foreach ($this->tokens as $token) {
  if ($token->type === FormattingTokenType::NEWLINE) {
    $y += $fontSize * $lineHeight;
    $x = $baseX;
    continue;
  } elseif ($token->type === FormattingTokenType::SPACE) {
    $x += strlen($token->value) * 10;
    continue;
  }

  if ($currentTokenIndex > $tokenAnimationIndex) {
    break;
  }

  $this->vg->fillColor($this->colorTokenMap[$token->type->getValue()]);
  $x = $this->vg->text($x, $y, $token->value ?? '');

  $currentTokenIndex++;
}

Not a smooth animation yet, but this becomes super easy now as we have all the info we need to apply one:
$color = $this->colorTokenMap[$token->type->getValue()];

if ($currentTokenIndex === $tokenAnimationIndex) {
  // move from right to left
  $x += 20 * (1 - $this->alphaEaseOut($tokenProgress));

  // move from bottom to top
  $y += 50 * (1 - $this->alphaEaseOut($tokenProgress));

  // fade in
  $color = new VGColor($color->r, $color->g, $color->b, $this->alphaEaseOut($tokenProgress));
}

$this->vg->fillColor($color);
$x = $this->vg->text($x, $y, $token->value ?? '');

Ey! We're finally gettig somewhere.
Also I forgot, the code above uses an simple easing function to make the transitions more smoothly:
private function alphaEaseOut(float $progress) : float
{
  return 1.0 - (1.0 - $progress) * (1.0 - $progress);
}

Export to Video
So, the final part involves getting our rendered frames into a video and/or GIF.
This is where ffmpeg comes into play. Even though the command-line interface feels like a foreign language, it's an incredibly powerful tool.
Create a new PHP file in the bin directory: bin/render.php.
We are going to use this separate entry point to boot our application in headless mode.
<?php

use VISU\Quickstart;
use VISU\Quickstart\QuickstartOptions;

$container = require __DIR__ . '/../bootstrap.php';

$videoWidth = 1280;
$videoHeight = 720;
$videoFramerate = 60;
$outputVideo = 'output.mp4';

$quickstart = new Quickstart(function(QuickstartOptions $options) use ($container, $videoWidth, $videoHeight)
{
    $options->appClass = \App\Application::class;
    $options->container = $container;
    $options->windowTitle = $container->getParameter('project.name'); // defined in: /app.ctn
    $options->windowVsync = false;
    $options->windowHeadless = true;

    $options->windowWidth = $videoWidth;
    $options->windowHeight = $videoHeight;
});
This is essentially a copy-and-paste from the start.php, but notice the following:
- We are specifying the window width and height explicitly; this will also be our video resolution.
windowVsync = false: we are disabling VSync as we want to render as fast as our hardware allows us to.windowHeadless: we enable the headless mode in VISU, which will disable creating a visible window among a few other things.$quickstart->app()->ready();: We run the ready function ourselves as we do not intend to initialize a game loop here.
Next, we need to open an ffmpeg process into which we can feed our frames.
$command = "ffmpeg -f rawvideo -vcodec rawvideo -pix_fmt rgb24 -color_trc linear -s {$videoWidth}x{$videoHeight} -r {$videoFramerate} -i - -c:v libx264 -pix_fmt yuv422p -vf vflip " . $outputVideo;

$process = proc_open($command, [
    0 => ["pipe", "r"], // STDIN
    1 => ["file", VISU_PATH_CACHE . "/ffmpeg-output.txt", "w"], // STDOUT
    2 => ["file", VISU_PATH_CACHE . "/ffmpeg-error.log", "a"]  // STDERR
], $pipes);

if (!is_resource($process)) {
    throw new \RuntimeException("Failed to open ffmpeg process, are you sure it's installed?");
}
Let me explain some of the arguments:
-f rawvideo -vcodec rawvideo: We are passing unprocessed input data.-pix_fmt rgb24: We pass each frame as anRGBRGBRGB...binary buffer. We use 8 bits per color, sorgb24.-color_trc linear: Our frames are in linear color space.-vf vflip: Our OpenGL frames are flipped; we unflip them here.
Then, allocate a buffer to write each frame into and declare how many frames to actually render. In a proper implementation, this should be calculated and not hardcoded, but the tutorial is already long enough.
$pixelBuffer = new \GL\Buffer\UByteBuffer();
$numberOfFrames = 1600;
Now we can iterate through each frame:
for($i=0; $i<$numberOfFrames; $i++) {

    echo "Frame: $i of $numberOfFrames (" . floor($i / $numberOfFrames * 100) . "%)\n";

    // tick and render the app
    $quickstart->app()->update();
    $quickstart->app()->render(0.0);

    // fetch the quickstart render target texture
    $texture = $quickstart
        ->app()
        ->renderResources
        ->findTextureByName('quickstartTarget.attachment.color_quickstartColor');

    // bind the texture and fetch the pixel data
    $texture->bind();
    glGetTexImage(GL_TEXTURE_2D, 0, GL_RGB, GL_UNSIGNED_BYTE, $pixelBuffer);

    // dump the pixel data to the ffmpeg process (RGBRGBRGB...)
    fwrite($pipes[0], $pixelBuffer->dump());
}

// close the pipe & process
fclose($pipes[0]);
proc_close($process);
That's it! Now, running php bin/render.php will generate an output.mp4 file with your animation.
Gif
Rendering a GIF from that MP4 is trivial again with ffmpeg.
$outputGif = dirname($outputVideo) . '/output.gif';
$paletteFile = dirname($outputVideo) . '/palette.png';
unlink($outputGif);
unlink($paletteFile);

$commandGif = "ffmpeg -i " . escapeshellarg($outputVideo) . " -vf fps={$videoFramerate},scale={$videoWidth}:-1:flags=lanczos,palettegen " . escapeshellarg($paletteFile);
passthru($commandGif);

$commandGif = "ffmpeg -i " . escapeshellarg($outputVideo) . " -i " . escapeshellarg($paletteFile) . " -filter_complex \"fps=30,scale={$videoWidth}:-1:flags=lanczos[x];[x][1:v]paletteuse\" " . escapeshellarg($outputGif);
passthru($commandGif);
Final Words
In the source code, I made some further modifications and optimizations, which would only further bloat this tutorial. This includes the final styling. If you're wondering how that's done, check the source code ;)
Big thanks to Brendt, not just for his open-source work but also for all the effort he puts into https://stitcher.io, making the PHP community a little better :)